To get an Atari up and running, you need several additional things:
Some power supplies were in the box sent to me, fortunately also a working one for the Atari 260ST. A so called briquette, black and heavy, with a real transformer, no switching power supply as it is common today. My monitor fortunately also has a VGA input, which is no longer common with newer monitors. No wonder, since PCs have had the digital HDMI ports for years now.
But what I didn't have at all was a special monitor cable with Atari connector on one side and VGA connector on the other. I was able to order one via Ebay Classifieds and now I could see for the first time on the monitor if the good piece worked.
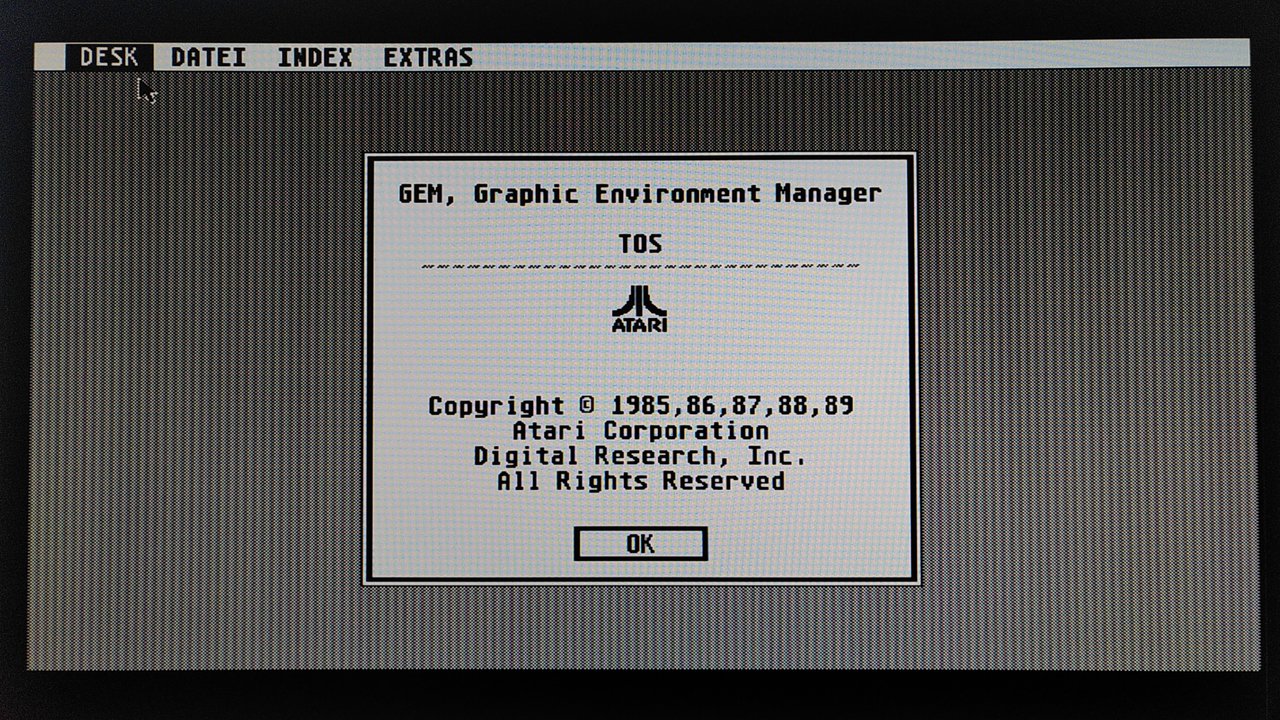
Switch it on and the desktop was visible.

Now I knew that the Atari works. Well, staring at a version note is not much fun. So the next task was to connect a mass storage device. I had gotten some old floppy drives, but what good are floppy drives if you don't have any floppy disks? And even then: The data has to be transferred from somewhere else to the floppy disks.
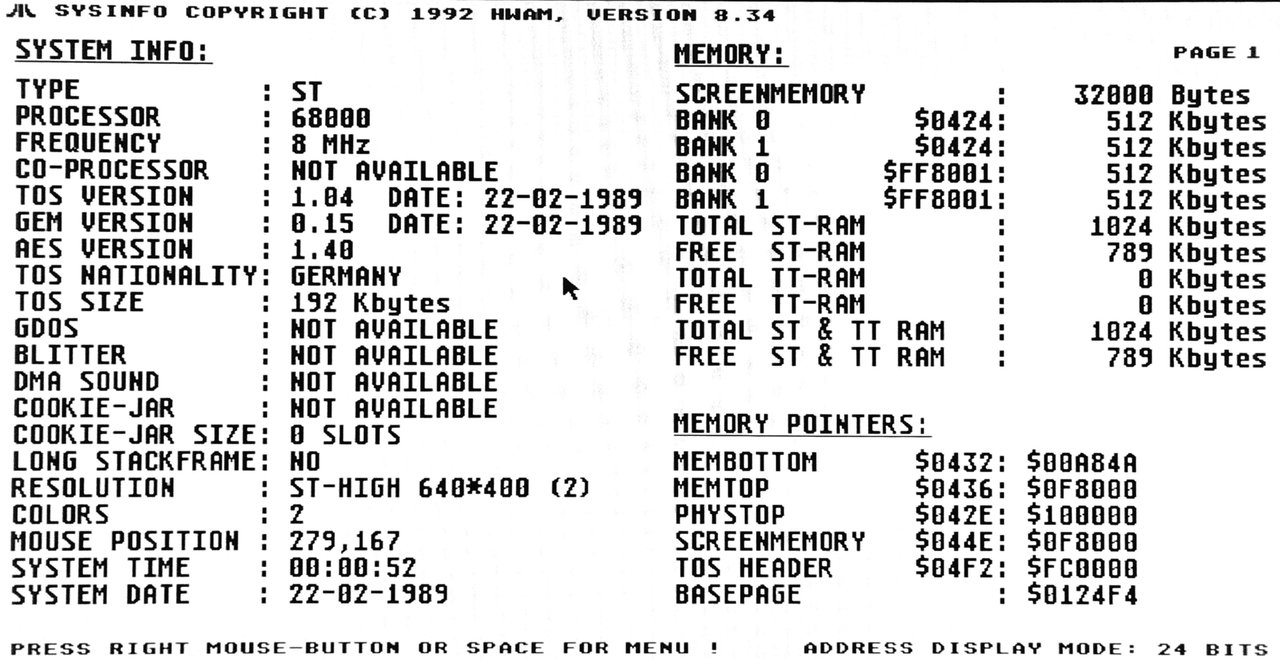
So I decided to buy a Gotek floppydrive emulator. But I can anticipate a bit and show you the system information, which I could output with the Gotek and the program SYSINFO.PRG:

So it's an Atari 260ST with one megabyte RAM and the TOS 1.04, here obviously retrofitted in self programmed EPROM bricks. The first Atari 260STs were delivered without an operating system. This had to be loaded from floppy disks first, which had the effect that only half of the original 512 KB RAM was free, because it was occupied by the operating system.
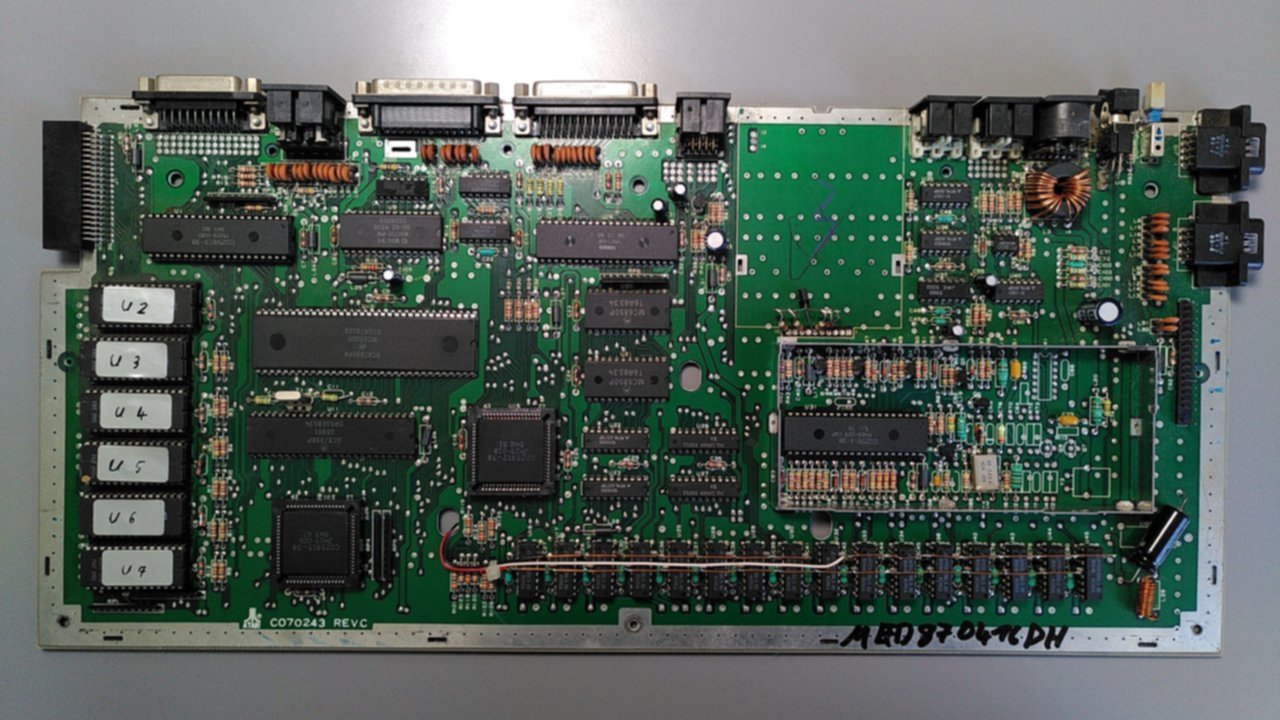
Atari later upgraded the STs with additional RAM. On the following picture of the mainboard, you can see that the RAM memories were piggybacked on the existing RAM components in the lower area. So to say an additional memory bank, now 1 MB memory, instead of 512 KB.
